

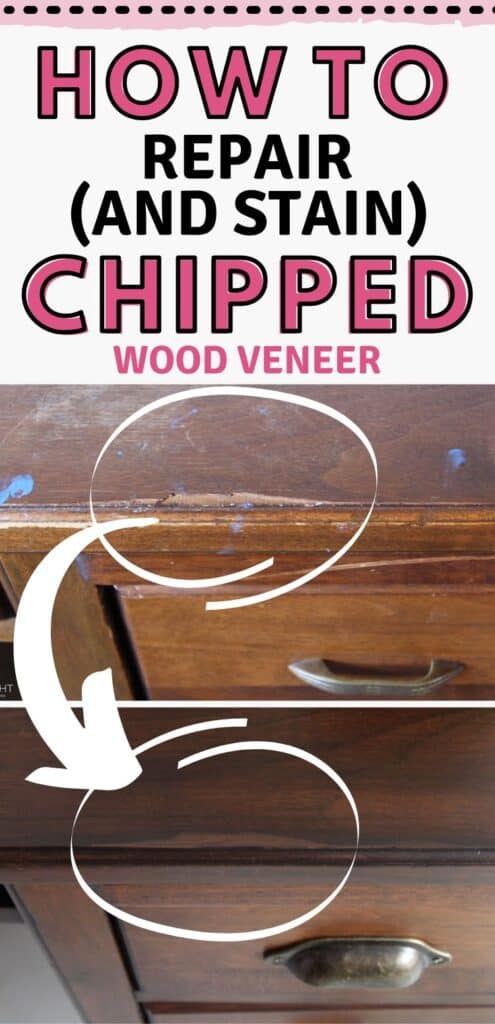
How Do You Repair Chipped Wood Veneer
It's inevitable that old wood furniture gets damaged over time. A lot of them accept a thin layer of pretty wood (called veneer) that gets caught on something and chips off. Don't sweat information technology though! Here's how to repair chipped veneer piece of furniture , and, every bit a BONUS, how to stain the repair (instead of painting information technology!)
Get our best tips for repairing old furniture here!
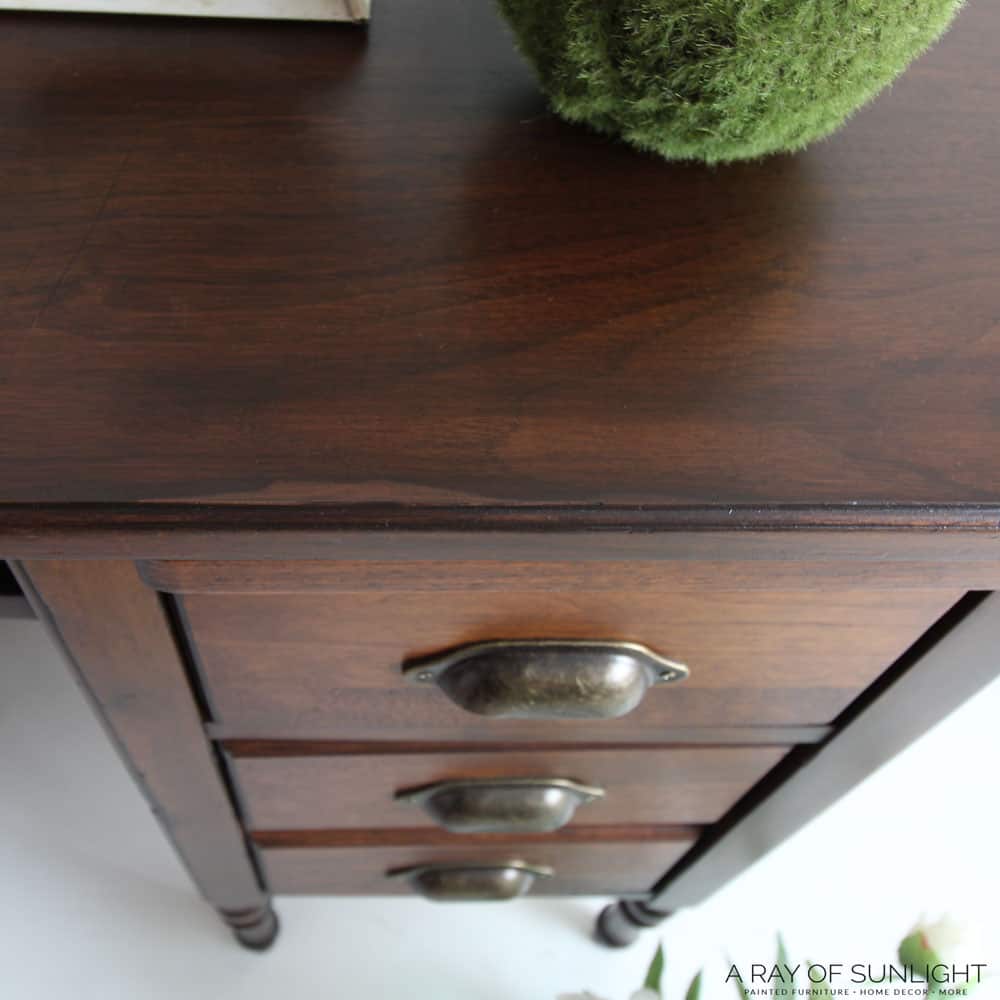
We snatched this pretty old desk off of Facebook Marketplace for $50! What a score!
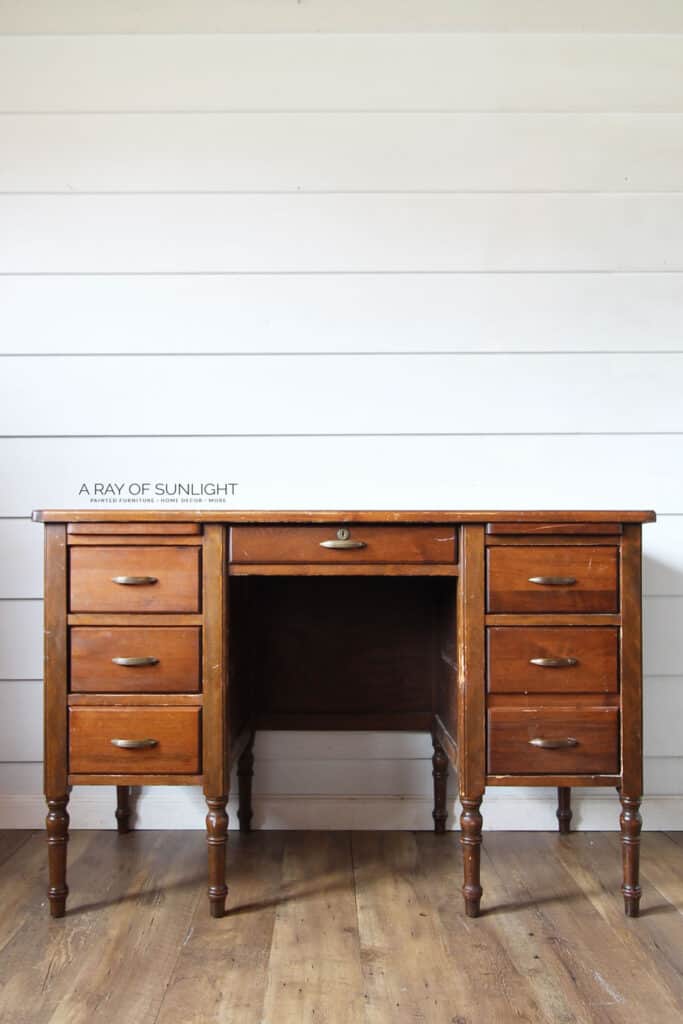
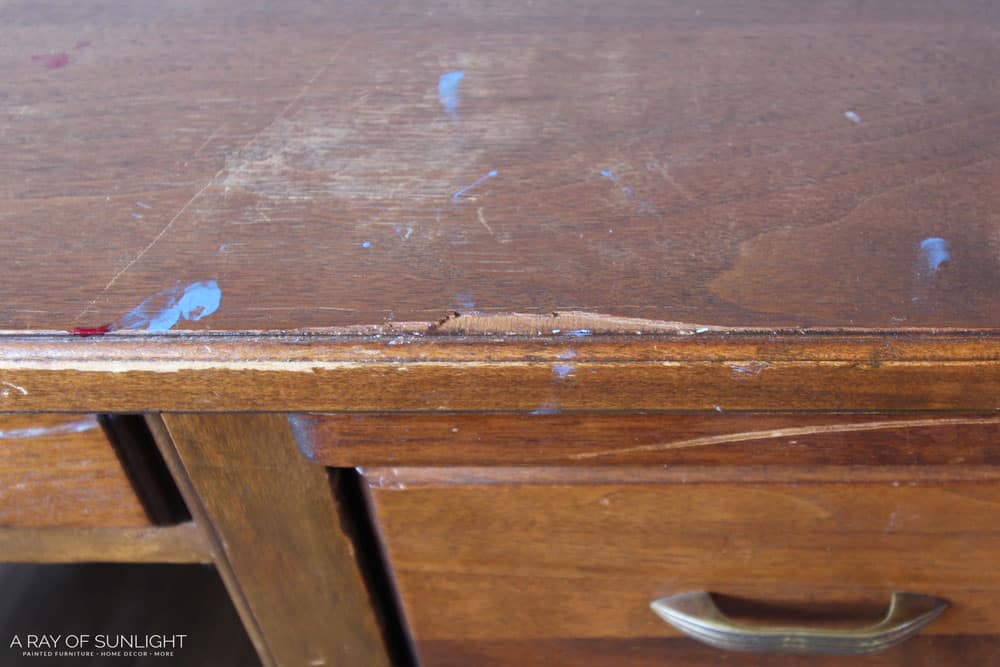
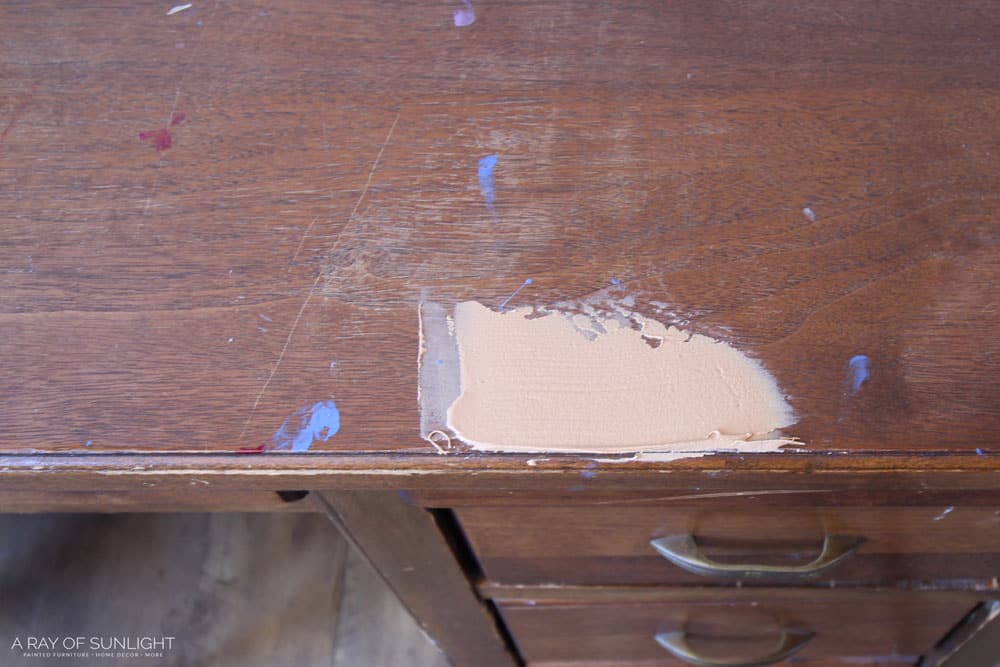
But it came with a tiny bit of damage in the form of chipped veneer on the peak and damage where the chair scoots in.
I didn't mind the small damage because honestly, I planned to have it apart and make nightstands. Have you seen those makeovers? This makeover on how to repurpose a desk-bound into alpine skinny nightstands is my favorite one I've done!
Get the Secrets!
Grab this super convenient Ebook with all of our secrets on how to repair furniture for simply $5. You lot can impress information technology out and accept instant access whenever you come across damaged article of furniture, and know exactly how to fix it!
Click on the picture of the volume to purchase!

But after I got it dwelling I decided that I wanted to keep it for myself in its original desk course, AND I wanted information technology stained to complement the woods tones on my recent chippy blue painted hutch that is going in the aforementioned room.
I recall it turned out pretty darn practiced! I've been using the desk-bound at present for a couple of weeks and I honestly forget that at that place used to be a chip in the veneer!
Here'south how I did it!
As an Amazon Associate, I earn from qualifying purchases. I also may earn from other qualifying purchases with other companies or go free product to review and employ. All opinions are my own.
How to Repair Chipped Veneer Furniture (and so stain information technology!)
- Scuff sand the damaged wood and right effectually the damaged area for the best results.
- Mix upward a small batch of Bondo Wood Filler and spread it over the chipped veneer.
- Let the Bondo Wood Filler dry and then sand information technology down.
- If the veneer has a lot of woods grain in it, add together some wood grain lines to your Bondo.
- Apply gel stain to stain the Bondo Wood Filler.
- Seal the gel stain for maximum durability.
- Enjoy!!
(Read on to acquire more than nigh each pace of the process and get links to all of the products you lot demand!)
Pace 1: Prep the Damaged Area by Scuff Sanding
For the best results, scuff sand the damaged area with 220 grit sandpaper. This will merely make information technology so the Bondo will stick really well.
Optional – Remove the Veneer
If your veneer is loose or pretty damaged, yous might desire to remove all of it instead of filling in the modding veneer. Hither is our video and tutorial on the insanely piece of cake mode to remove veneer.
Step 2: Mix upwards the Bondo Wood Filler and Spread it Over the Damage
Bondo Woods Filler is a two-part wood filler that dries very difficult very rapidly. So it'south perfect for big repairs and also chipped veneer repairs.
If yous're painting the damaged surface area, yous can utilise the regular Automotive Bondo, All-Purpose Bondo, or the Bondo Wood Filler.
But when y'all demand to stain the damaged area, it'south best to utilize the Bondo Wood Filler because it dries a natural wood color.
You'll need to work quickly because information technology dries so fast. You have well-nigh 5 minutes to work with it once you start mixing. Later on near five minutes it will outset to harden and it will be hard to piece of work with.
Later on nearly 30 minutes it volition be dry and then you can sand information technology downward.
I like to mix my Bondo on a slice of paper-thin or a piece of chip wood.
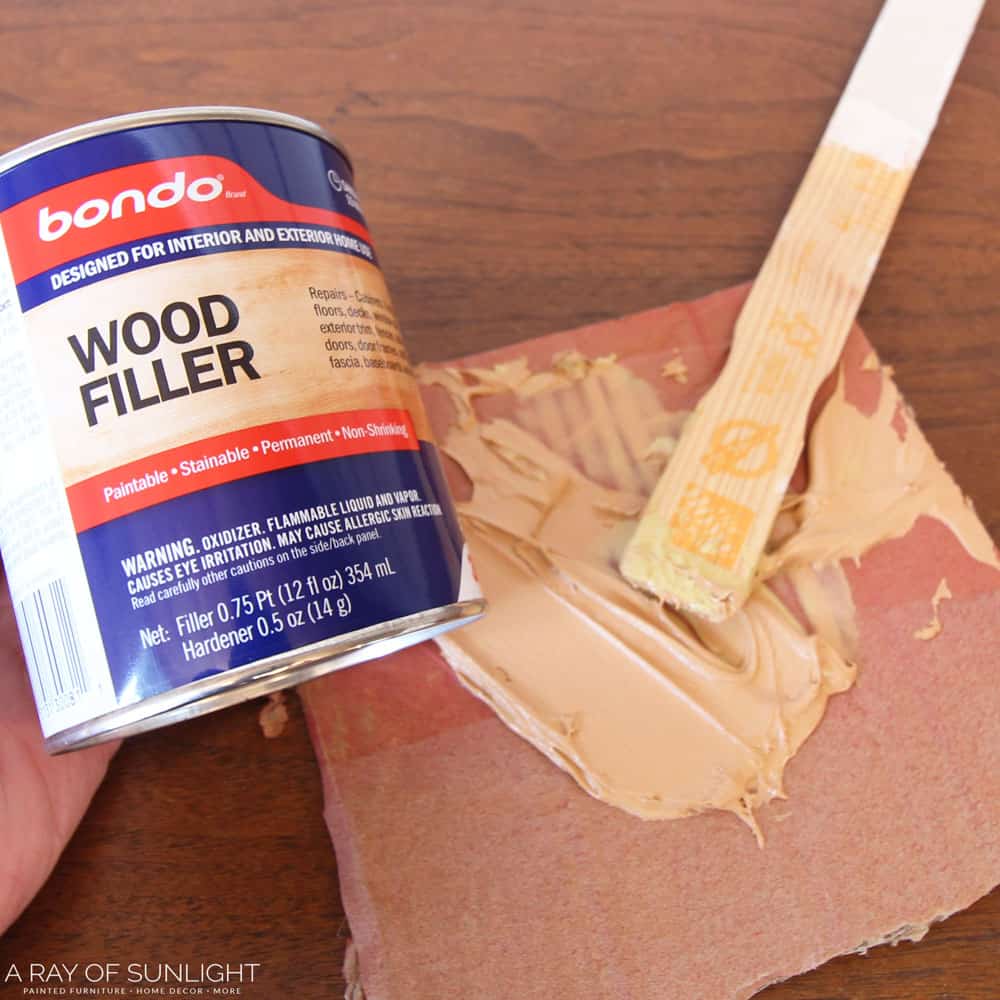
How to Mix Bondo Wood Filler
Simply get a blob of Bondo base out of the container and put information technology on the cardboard. And then squeeze a piffling bit of hardener (from the tube) onto the Bondo. (Read the dorsum of the tin can for more detailed instructions on how much of each to use).
Then mix the two parts together until it'south i even color.
Use a apartment edged tool like the Bondo spreader or a plastic putty knife to spread the Bondo all over the damaged area. (I like to fill the damage with more than needed so I can sand it down completely smooth and flat)
Step 3: Allow the Bondo Forest Filler Dry – Then Sand Down Smooth
In one case the Bondo is dry (about thirty minutes afterwards) you can sand it down smooth with the rest of the woods veneer.
I like to sand most of it with 100 dust – 150 grit sandpaper first and and then move my manner up the grits until I go to 220. I end on 220 dust sandpaper for the best surface for staining.
This 3M Pro Form Advanced Sandpaper is the all-time brand / type of sandpaper. It'due south a bit more expensive than the cheapest sandpaper out there, but it holds up and lasts longer. And information technology doesn't clog as fast either!
If you're working with a big area and a apartment surface, you tin apply a power sander instead of sanding past mitt.
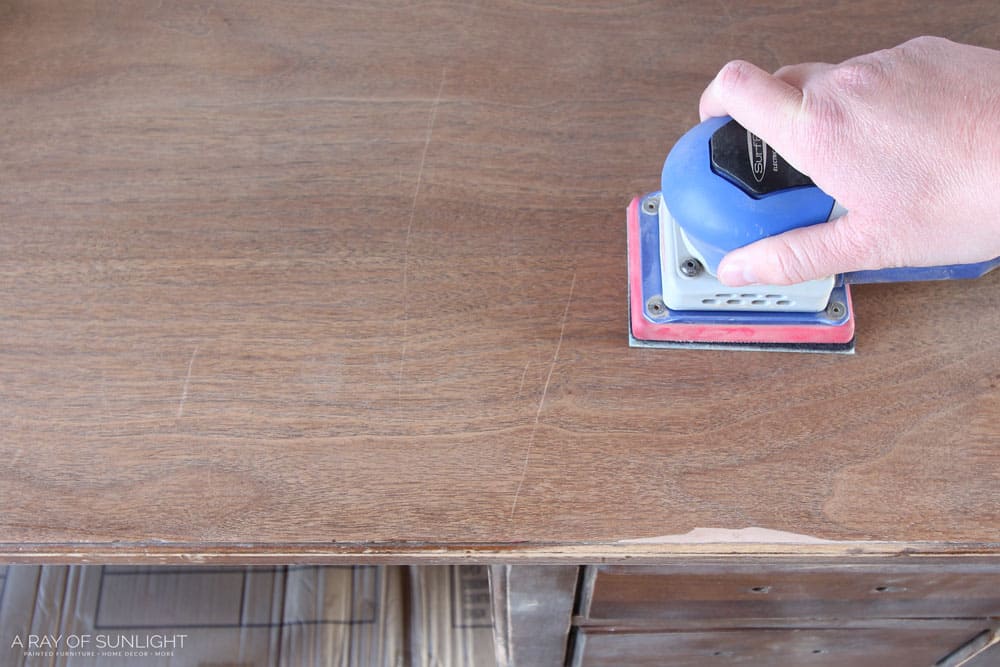
**Note: I sanded the unabridged superlative of this desk downward to bare wood because of the scratches dings and nail polish on it. You lot don't have to remove the finish surrounding the damaged expanse though! But if I didn't sand the entire top of the desk, I would accept practical at to the lowest degree ane glaze of Coffee Gel stain on the entire summit to give it all one even coat.
Stride 4: (Optional) Add together Wood Grain Marks with Utility Knife
If your wood veneer has a lot of woods grain in it (similar oak wood) so you can recreate the woods grain with a utility knife.
Simply put little and long random marks all over in the veneer with a utility pocketknife.
Be sure to sand information technology down a little bit with 220 dust sandpaper to make it nice and polish again.
Footstep 5: Stain the Bondo Wood Filler with Gel Stain
Now it'southward time to bust out the gel stain.
The Best Manner to Stain Wood Filler – Gel Stain!
It's super important to use Gel stain instead of regular woods stain!
Gel stain is thicker and formulated to sit on tiptop of existing surfaces.
Wood Stain is fabricated to soak into the wood.
The Bondo Woods Filler can't have wood stain the same way that wood can (plus all types of wood will take the same color of forest stain a little differently too!)
So, for all-time results when staining Bondo Wood Filler, use a gel stain.
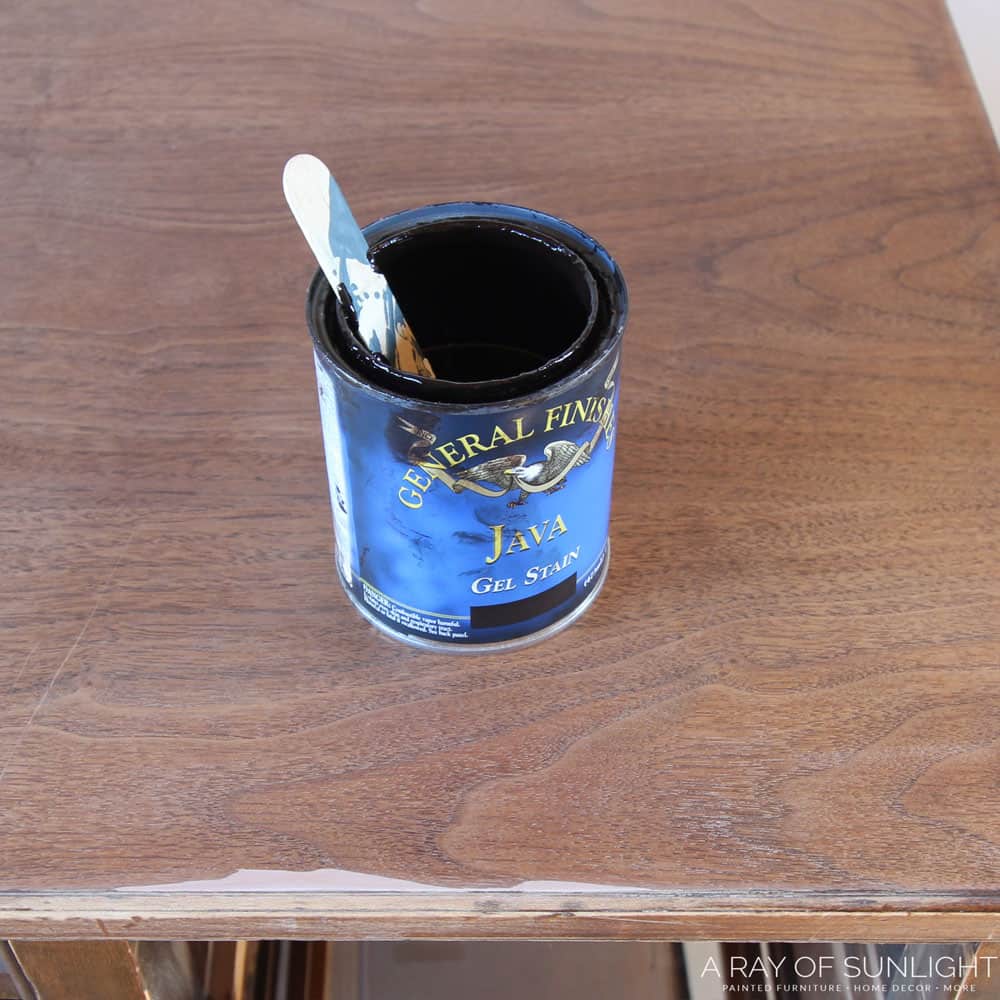
I used Java Gel Stain by General Finishes for this repair.
(Actually, I decided to stain the whole entire desk in Java Gel Stain ((you don't have to strip the sometime end all the way off to use gel stain!!) for a really quick updated look)
How to use Gel Stain over Woods Filler
- Use a stir stick to mix the gel stain really well.
- Put on your latex or vinyl gloves or else your fingers will get stained!
- Dip a lint-free rag into the gel stain.
- Wipe the gel stain onto the wood filler and the surrounding areas
- Allow the gel stain sit down for most 30 seconds to commencement drying and then wipe the excess away with a clean lint free rag.
- Permit dry for 24 hours and and so apply a second glaze.
Tips and All-time Practices for Using Gel Stain
- Y'all can brush it on or wipe it on. I like to apply thin coats with a lint free rag to prevent streaks or brush marks.
- If you apply more gel stain before the gel stain completely dries, the new coat of gel stain volition lighten the (even so wet) get-go coat. And then brand sure the gel stain is completely dry before yous put a second glaze of gel stain over it!
- Dispose of your rags properly! Exercise not throw wet stained rags into the trash, equally they could combust. I personally like to hang mine up outside on the clothesline to dry completely earlier disposing of them.
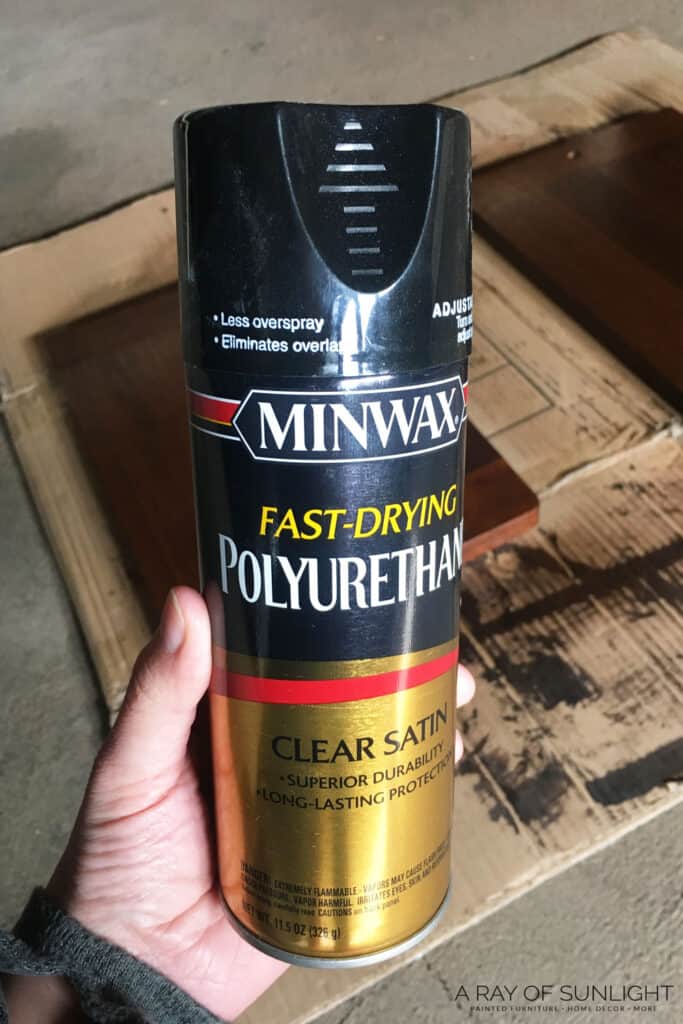
Pace 6: Seal with Polyurethane
Fifty-fifty though the back of the gel stain can says that you don't need to seal it, ignore it and seal the gel stain.
The very first time I used gel stain over a stained dresser, I didn't seal it with poly. A few months afterwards I concluded up with a dainty big scratch in the gel stain, on the top of the dresser.
The polyurethane will protect your stained surface from getting hands scratched!
I personally like to utilise this Minwax oil based poly in the spray can. It sprays beautifully and is really like shooting fish in a barrel to use!
**In a pinch, I tried the Varathane brand of oil-based poly in the spray can and it spit and sputtered all over. (I tried two divide spray cans and both spit large drops of poly all over). Despite shaking them very well before spraying and shaking the tin a lot while I was spraying.
And then I switched back to the Minwax brand and I was reminded by how well the Minwax Oil Based poly sprays from the spray can!
If you don't want to spray, this Minwax Wipe on Poly is my adjacent favorite way to seal Gel Stain. I wipe it on with a lint gratis rag, laying it on thick and only wiping it on (and non touching it anymore than when I wipe it on).
Footstep 7: Enjoy!
Let your poly dry for at to the lowest degree 24 hours before setting anything on it. And then brand sure to be very conscientious with your fresh new stained finish for about a month. It takes about a month for the products to cure (dry into the most durable surface).
Enjoy your masterpiece!
Click here to see what this gel stained desk looks similar now!
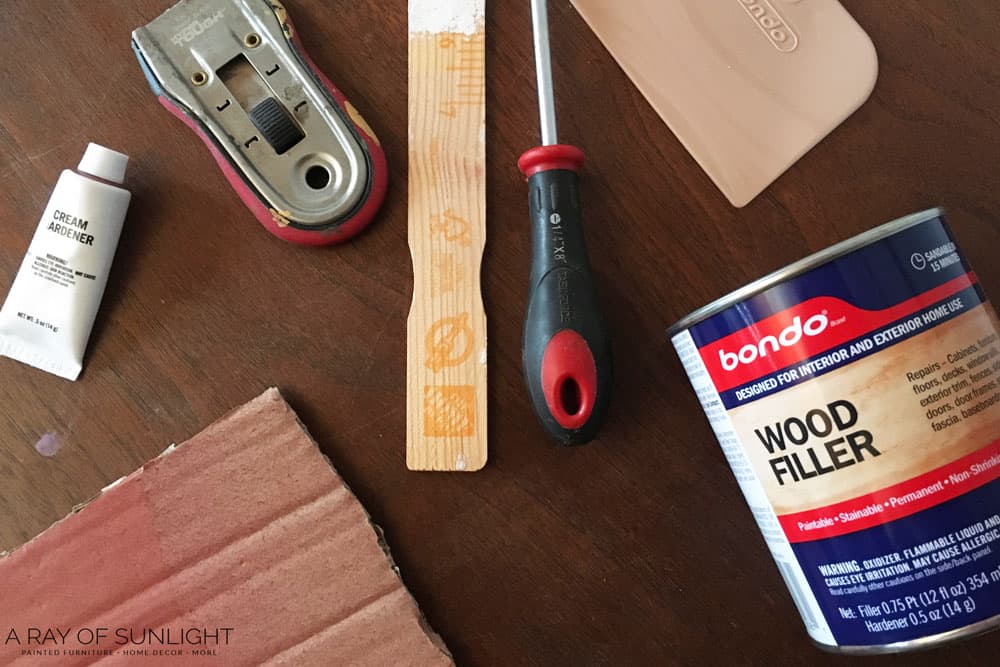
Supplies Used:
- 220 Dust Sandpaper (this is the all-time and my favorite sandpaper)
- Bondo Woods Filler and Bondo Spreader
- Former piece of cardboard or scrap slice of wood (to mix Bondo on)
- Utility Knife (if you desire to make woods grain marks in your Bondo)
- Gel Stain (this Java Gel Stain by General Finishes is my favorite and what I used)
- Lint free rag or cut up t-shirt
- Latex Gloves
- Polyurethane (This is my favorite spray version! The spray is the best I've found! I don't recommend Varathane oil-based in the spray can. With two different cans, it kept spitting large drops of polyurethane all over. It was a disaster. )
PIN THIS TUTORIAL FOR LATER

How Do You Repair Chipped Wood Veneer,
Source: https://arayofsunlight.com/repair-stain-chipped-veneer-furniture/
Posted by: vidalfarands.blogspot.com
0 Response to "How Do You Repair Chipped Wood Veneer"
Post a Comment